In the past few posts, we’ve been learning how to properly stand and how to correctly grip our pistols. Accurate shooting can be thought of as the culmination of a skill triangle, incorporating stance, grip, and sighting. Without all three, your accuracy suffers. Today we’re going to cover that third topic: Sight Alignment.
SIGHT FUNCTIONS
Weapon sights are designed to offer some means of aligning barrel with target, thus allowing consistent, accurate fire.
Iron sights, reflex sights, dot sights, scopes, lasers; no matter the type, their design is to help you direct your shots to your target. Most firearms are manufactured with some manner of iron sights, which is what we’ll focus on learning to use. By far, these will be the most common type of sights you’ll encounter when dealing with weaponry, and almost certainly what you’ll have on your pistols.
IRON SIGHTS
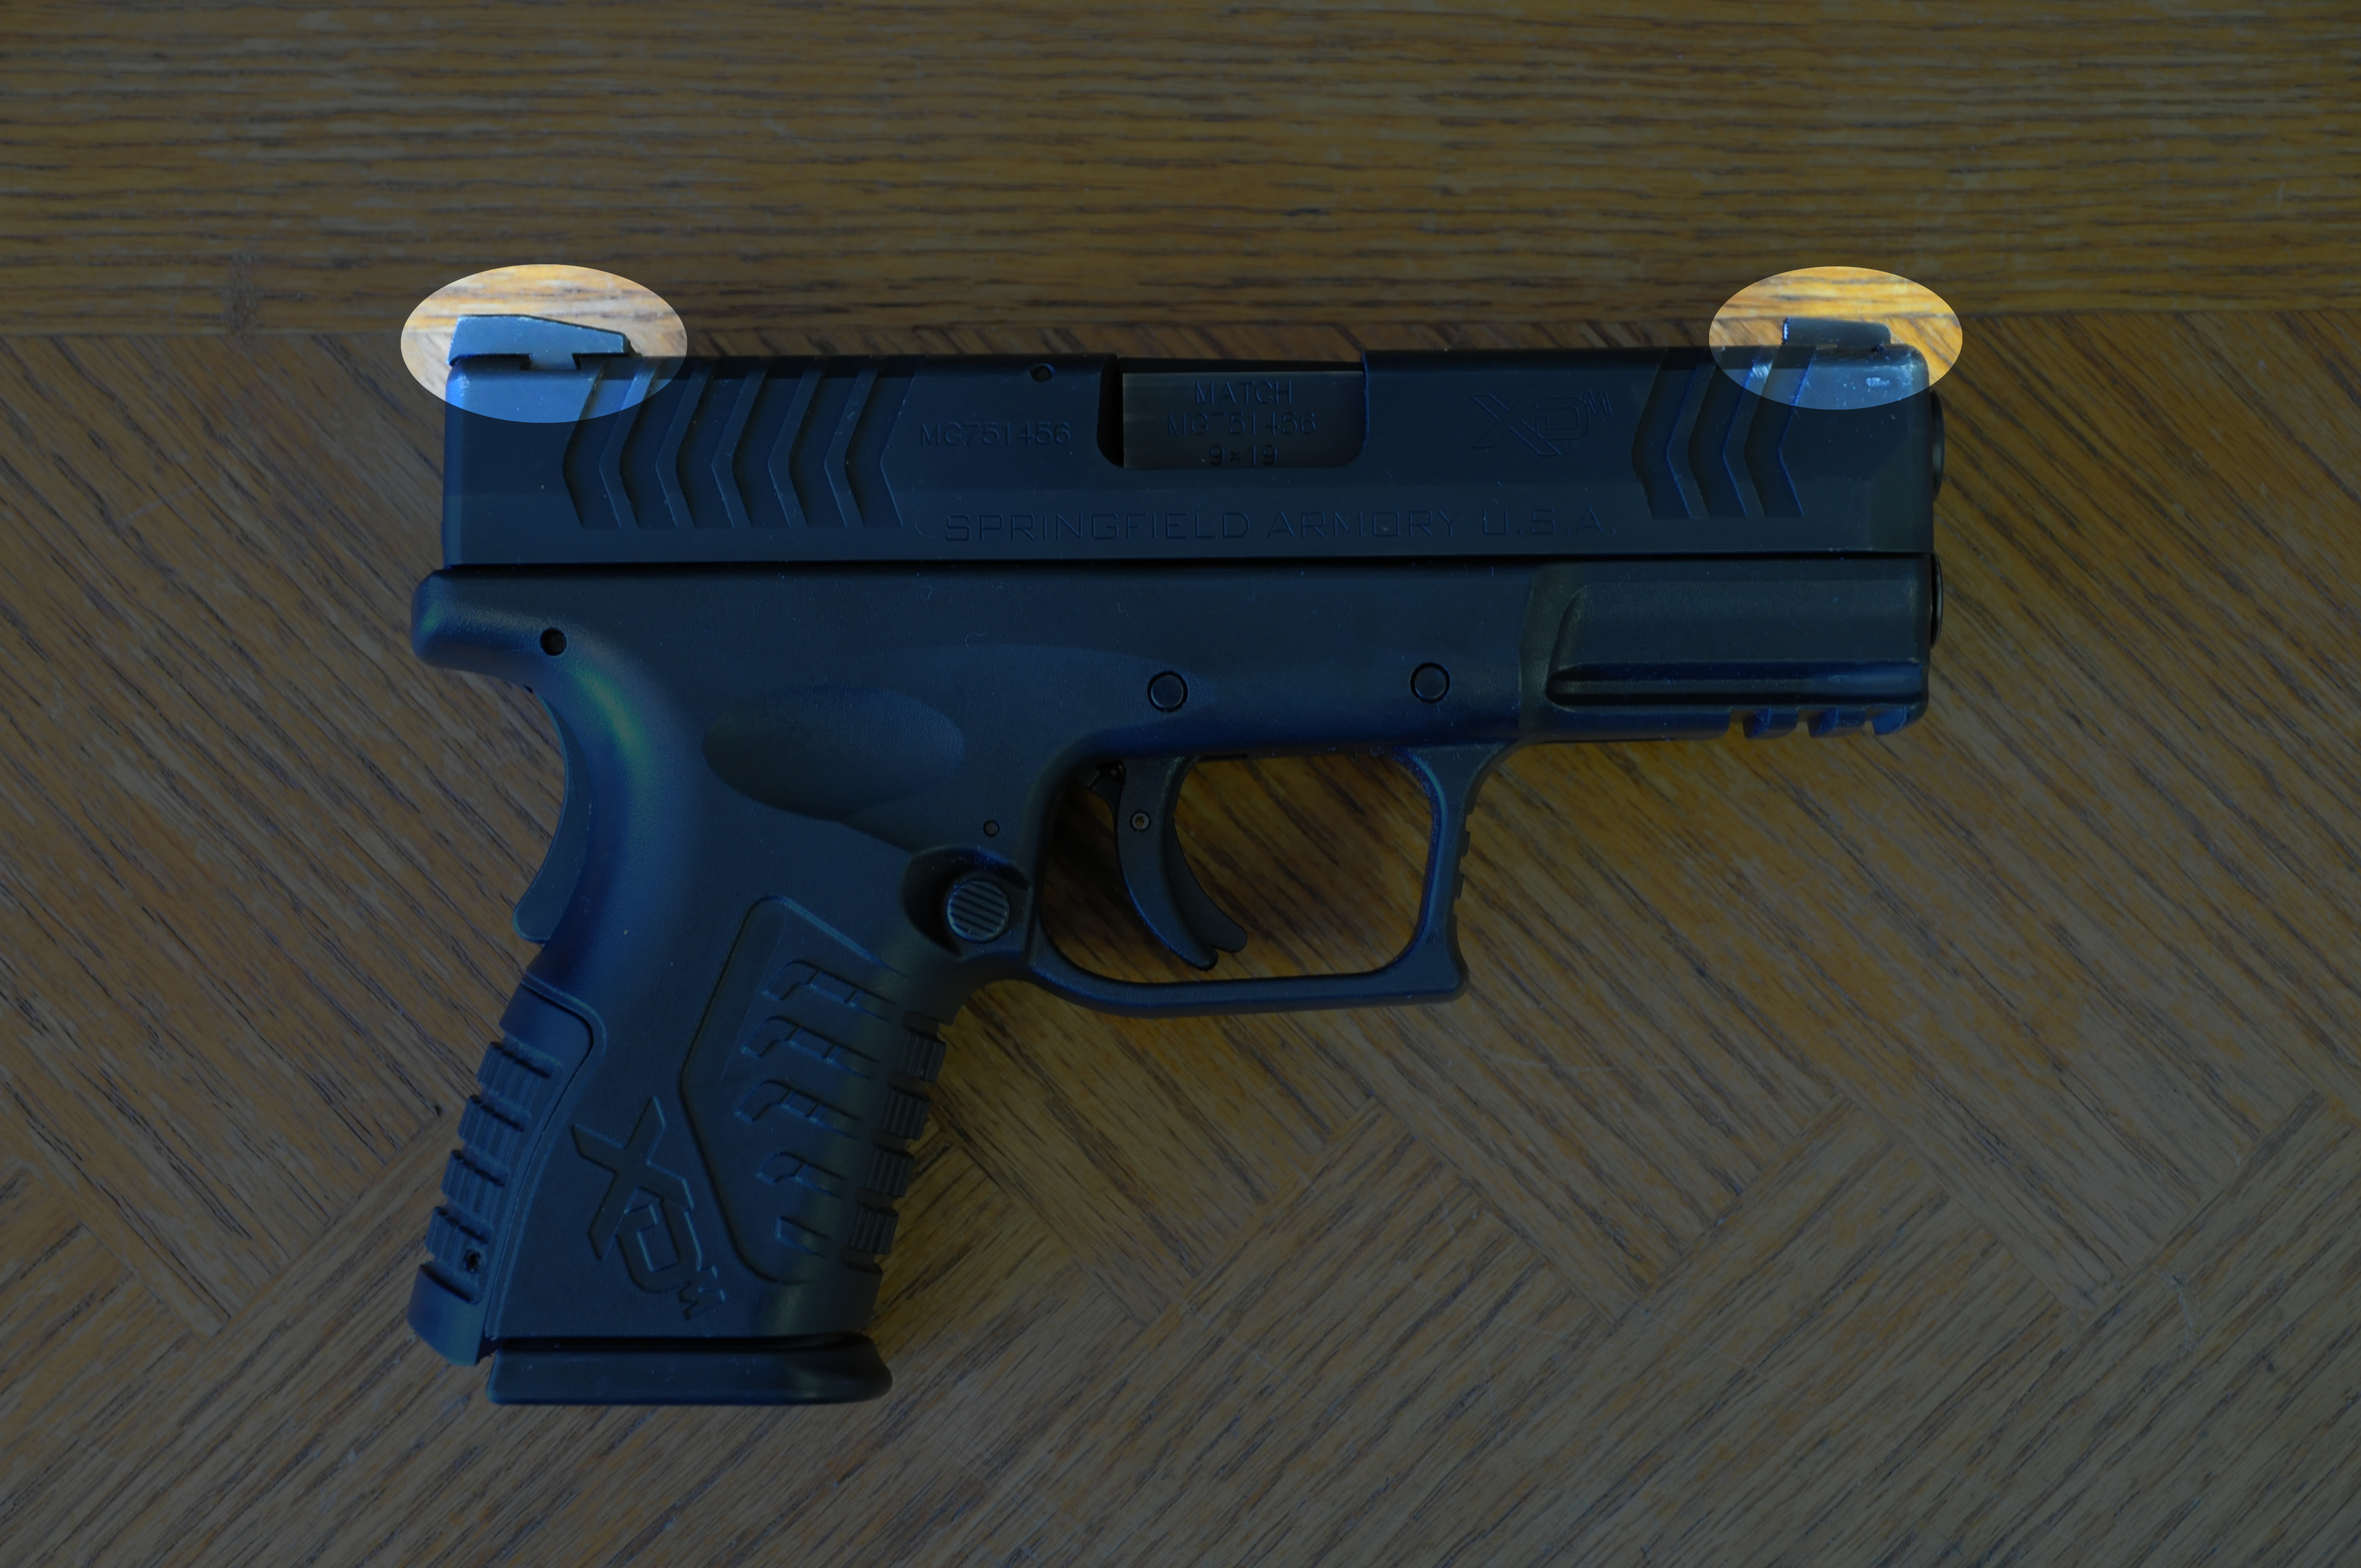
Back in the Basic Anatomy of a Hangun post, I pointed out the front and rear sight on my Springfield XDm. These are the factory iron sights, and when used properly, they are a very effective aiming system. They are composed of two specifically shaped metal markers, one at the very front of the weapon, and one at the rear.
The rear sight has a notched cutout in the middle, and in the case of my handgun, two dots painted on either side. The front sight is simply a post in the center of the slide, and it also has a dot painted on it. These are called open sights, and are commonly seen on civilian and law enforcement weapons. Closed sights, by contrast, use a system of aligning circular holes, and are seen on many military rifles.
Also worth noting is sight radius, which is the distance between the two sights. Increasing the sight radius (by moving them further apart) makes a weapon inherently more precise due to an increased perception of sight misalignment. In real terms, with everything else being equal, you’re more liable to be accurate with a weapon that has a 10″ sight radius than one with a 5″ sight radius.
In any case, theses sights are utilizing by lining them up, which is where things get a little tricky.

This diagram displays both proper and improper sight alignment. In the bottom right, you’ll see what correct sight alignment looks like. The two blurred out posts on the left and right represent the rear sight. The front sight lines up centered and level, completing sight alignment. With your sights properly aligned, your shot will impact the target right at the top of the front sight. (This somewhat depends on what firearm you’re using, but for the most part is true.)
Across the top, we see what happens when the sights are not aligned properly. Keep in mind that even small adjustments, even a sixteenth of an inch, will throw off your shot.
Also worth mentioning is sight picture. You may notice in the picture of proper sight alignment that the target and the “rear sight” are blurred out. That is because your eyes should be focused, not on the target, but on the front sight. I know this sounds counter intuitive, but there’s some simple science that backs it up.
Your eyes are only capable of focusing on one distance and object at a time. Aiming a weapon tasks you with focusing on three, the rear sight, front sight, and target. Physically, this is impossible, so we compromise.
We focus 100% on the front sight because sight alignment is the most critical component of an accurate shot.
While focusing on the front sight, you can concentrate on lining it up between the rear sight blades, ensuring your bullet will go where the sights are pointed. Your target is the secondary focal point, and although out of focus, you can still aim your front sight well enough to make extremely accurate shots.
IMPROVING SIGHT ALIGNMENT
All this knowledge is well and good, but what can you do with it? How do you go about practicing your sight alignment? It’s very easy. The simplest way to improve is to take your UNLOADED firearm, pick a safe target (always follow the safety rules!) draw your weapon, and aim.
Take your time. Practice alternating your focus between the front sight and your target; you’ll see the change in perception. Consciously study what your sights look like in proper alignment. When you first start doing this, you’ll likely notice sway or shake in your sights because your arms and hands aren’t accustomed to this posture. With time, as the muscles develop and you gain proficiency, you’ll see steadiness increase.
This is also an excellent and easy way to practice your stance and grip! Take even just a few minutes a day to practice these skills and you’ll make leaps and bounds in your shooting prowess, all without spending a penny.
Until next time, have fun, stay safe, and shoot straight! (Because now you know how!)

[…] main point of contact between the rifle and it’s user. A well-designed stock is crucial to sight alignment, and therefore accuracy. In technicality, the stock of a bolt action rifle is the carrier for the […]
LikeLike